How to Put Eye Drops in Your Own Eyes: A Step-by-Step Guide
Putting eye drops in your own eyes may seem like a challenging task, but with a little practice and proper technique, it can become a routine part of your eye care routine. Follow these step-by-step instructions to ensure you administer the eye drops correctly:
1. Gather the necessary supplies
Before you begin, make sure you have all the supplies you’ll need to put eye drops in your own eyes. These supplies include:
- Eye drops
- A clean tissue or cotton ball
- A mirror
Having these supplies ready and within reach will help make the process easier and more efficient.
2. Wash your hands thoroughly
Before handling the eye drops or touching your eyes, it’s crucial to wash your hands thoroughly with soap and water. This step helps ensure that your hands are clean and free from any potential bacteria or germs that could cause an infection.
3. Position yourself properly
Find a comfortable place to sit in front of a mirror. Good lighting is essential, so make sure the area is well lit. Tilt your head back slightly to create a better angle for administering the eye drops.
4. Open the eye drop bottle
Remove the cap from the eye drop bottle, being careful not to touch the tip with your fingers. It’s important to avoid contamination of the eye drops. Take a moment to check the expiration date on the bottle to ensure the eye drops are still safe to use. If instructed on the label, shake the bottle well to ensure proper mixing of the ingredients.
5. Administer the eye drops
Gently pull down your lower eyelid to create a small pocket. This pocket will hold the eye drop. Look up and squeeze the eye drop bottle to release a single drop into the pocket created by the lower eyelid. Avoid blinking or squeezing your eyes tightly immediately after applying the eye drop to allow it to spread evenly across the eye.
6. Close your eyes and blink
After applying the eye drop, close your eyes gently. This step allows the medication to distribute over the surface of the eye. Wait for a few seconds before opening your eyes again. Blink a few times to help spread the eye drop across the entire eye.
7. Deal with any side effects
Sometimes, certain eye drops may cause a slight burning or stinging sensation initially. This sensation should subside quickly. However, if you experience any significant discomfort or continue to have side effects, it’s important to consult with an eye care professional. Different eye drops may have specific side effects, such as redness, itching, or swelling. Be aware of these potential side effects and seek professional advice if necessary.
8. Store the eye drops properly
After using the eye drops, recap the bottle tightly to prevent contamination. Store the eye drops in an area with a controlled temperature, as instructed on the bottle. Some eye drops may require refrigeration, so make sure to follow the specific storage instructions provided. Proper storage helps maintain the effectiveness of the eye drops.
Putting eye drops in your own eyes doesn’t have to be a daunting task. By following these step-by-step instructions and taking the necessary precautions, you can successfully administer your eye drops and take care of your eyes.
How to Put Eye Drops in Your Own Eyes: A Step-by-Step Guide
Putting eye drops in your own eyes may seem like a daunting task, but with a little practice and proper technique, it can be done easily and effectively. Follow this step-by-step guide to learn how to administer eye drops on your own.
Step 1: Prepare for putting eye drops in your own eyes
Gather all the necessary supplies before you begin. You will need the eye drops prescribed by your eye care professional, a clean tissue or cotton ball, and a mirror. It’s important to wash your hands thoroughly with soap and water to prevent any potential infection.
Step 2: Position yourself properly
Sit down comfortably in front of a mirror that provides good lighting. Tilt your head back slightly to create a better angle for administering the eye drops.
Step 3: Open the eye drop bottle
Remove the cap from the eye drop bottle, being careful not to touch the tip with your fingers. Take a moment to check the expiration date on the bottle to ensure that the eye drops are still safe to use. If instructed on the label, shake the bottle well before use.
Step 4: Administer the eye drops
Gently pull down your lower eyelid to create a small pocket. Look up and squeeze the eye drop bottle to release a single drop into the pocket created by the lower eyelid. Try to avoid blinking or squeezing your eyes tightly immediately after applying the eye drop to allow it to spread evenly across the eye.
Step 5: Close your eyes and blink
Close your eyes gently after applying the eye drop. Wait for a few seconds to allow the medication to distribute over the surface of your eye. Then, blink a few times to help spread the eye drop across the entire eye.
Step 6: Deal with any side effects
Some eye drops may cause a slight burning or stinging sensation initially, but this should subside quickly. If you experience any significant discomfort or continue to have side effects, it’s important to consult with an eye care professional. Be aware of potential side effects specific to certain eye drops, such as redness, itching, or swelling, which may occur with gentamicin eye drops.
Step 7: Store the eye drops properly
Recap the eye drop bottle tightly to prevent contamination and keep it in an area with a controlled temperature. Follow the instructions on the eye drop bottle for proper storage, as some eye drops may require refrigeration. If you need to use diluted atropine eye drops or cool black eye drops, make sure to follow the specific instructions provided by your eye care professional.
Putting eye drops in your own eyes can become a simple and routine task with practice. By following these steps and taking proper precautions, you can ensure that you are effectively administering your eye drops and maintaining good eye health.
How to Put Eye Drops in Your Eyes: Step-by-Step Guide
Putting eye drops in your own eyes may seem challenging at first, but with a little practice and proper technique, it can become a routine part of your eye care routine. Follow these steps to ensure you administer eye drops correctly:
Step 1: Prepare for putting eye drops in your own eyes
- Gather all necessary supplies, such as the eye drops, a clean tissue or cotton ball, and a mirror.
- Wash your hands thoroughly with soap and water to prevent any potential infection.
Step 2: Position yourself properly
- Sit down comfortably in front of a mirror, ensuring good lighting.
- Tilt your head back slightly to create a better angle for administering the eye drops.
Step 3: Open the eye drop bottle
- Remove the cap from the eye drop bottle, being careful not to touch the tip with your fingers.
- Check the expiration date to ensure the eye drops are still safe to use.
- Shake the bottle well if instructed on the label.
It’s important to note that different eye drops may have specific instructions on shaking or not shaking the bottle, so always refer to the label or consult with an eye care professional.

Bimat eye drops are used to treat hypotrichosis, short, weak eyelashes. Bimat increases the length, thickness and enhances the color of eyelashes. These substances are also used to lower intraocular pressure in patients with a diagnosis of glaucoma. By reducing the pressure, the risk of blindness is significantly decreased.
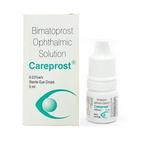
These drops gained immense popularity, demonstrating an incredibly fast and always noticeable result since its application. This innovative means will allow you to give your eyelashes an ideal look, strength and health, in whatever serious condition they are before the moment of its application. It is safe and effective providing amazing results.
This means is prescribed to reduce eye pressure. Its active ingredient is synthetic prostaglandin bimatoprost – an unsaturated fatty acid, similar in its properties to hormones. Getting into the eye, drops help maintain the balance of the flow and outflow of eye fluid. It is a violation of this balance that leads to an increase in pressure, due to which the blood supply to the eye is impaired and the load on the optic nerve increases.

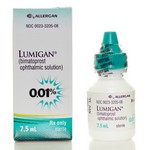
Bimatoprost reduces IOP in humans by increasing the outflow of aqueous humor through the trabecular meshwork and uveoscleral outflow. IOP reduction begins about 4 hours after the first use. The maximum effect is achieved after about 8–12 hours. The effect lasts for at least 24 hours.
Administering Eye Drops: Step-by-Step Guide
Administering eye drops may seem intimidating at first, but with a few simple steps, you can easily and safely apply them to your eyes. Follow the guidelines below for a successful and comfortable experience.
- Prepare for putting eye drops in your own eyes
- Gather all necessary supplies, such as the eye drops, a clean tissue or cotton ball, and a mirror.
- Wash your hands thoroughly with soap and water to prevent any potential infection.
- Position yourself properly
- Sit down comfortably in front of a mirror, ensuring good lighting.
- Tilt your head back slightly to create a better angle for administering the eye drops.
- Open the eye drop bottle
- Remove the cap from the eye drop bottle, being careful not to touch the tip with your fingers.
- Check the expiration date to ensure the eye drops are still safe to use.
- Shake the bottle well if instructed on the label.
- Administer the eye drops
- Gently pull down your lower eyelid to create a small pocket.
- Look up and squeeze the eye drop bottle to release a single drop into the pocket created by the lower eyelid.
- Avoid blinking or squeezing your eyes tightly immediately after applying the eye drop to allow it to spread evenly across the eye.
When administering eye drops, it is crucial to be gentle and precise. Take your time and follow the instructions provided with your specific eye drop medication. Proper administration will maximize the effectiveness of the treatment and minimize the risk of side effects.
How to Properly Blink After Applying Eye Drops
After applying eye drops, it is important to blink properly to ensure that the medication is evenly distributed across the entire eye. Here are a few steps to follow:
- Close your eyes gently: After applying the eye drop, close your eyes gently. This allows the medication to stay in contact with the eye’s surface.
- Wait for a few seconds: Give the eye drop a few seconds to distribute over the eye’s surface. This helps ensure that the medication is properly absorbed.
- Blink a few times: After waiting for a few seconds, blink your eyes a few times. Blinking helps spread the eye drop across the entire eye and ensures that it reaches all areas of the eye’s surface.
It is important to note that blinking too forcefully or rapidly immediately after applying the eye drop can cause the medication to be expelled from the eye. Therefore, it is recommended to blink gently and in a relaxed manner.
Some eye drops may cause a slight burning or stinging sensation initially, which should subside quickly. This is a common side effect and is usually not a cause for concern. However, if you experience any significant discomfort or if the side effects persist, it is advisable to consult with an eye care professional.
According to a survey conducted by the American Academy of Ophthalmology, about 20% of patients do not properly blink after applying eye drops. This can result in inadequate distribution of the medication and reduced effectiveness of the treatment. Therefore, it is important to follow the proper blinking technique to ensure optimal results.
To learn more about eye drop application and proper blinking techniques, you can visit the American Academy of Ophthalmology’s website at www.aao.org. They provide valuable information and resources on various eye care topics.
In conclusion, proper blinking after applying eye drops is essential for the effective distribution of the medication. By following the steps outlined above, you can ensure that the eye drop reaches all areas of the eye’s surface, maximizing its benefits. Remember to always consult with an eye care professional if you have any concerns or questions about using eye drops.
Dealing with Side Effects of Eye Drops
When using eye drops, it’s important to be aware of potential side effects that may occur. While most side effects are mild and temporary, some individuals may experience more severe reactions. Here are some steps to take when dealing with side effects:
1. Be prepared for possible discomfort
It’s not uncommon for some eye drops to cause a slight burning or stinging sensation upon application. This discomfort is usually temporary and should subside quickly. If you experience this sensation, try to remain calm and keep your eyes closed for a few moments. This will give the medication time to distribute over the eye’s surface.
2. Consult an eye care professional if discomfort persists
If you continue to experience significant discomfort or if the side effects do not subside, it’s important to consult with an eye care professional. They can determine whether the eye drops are causing an adverse reaction and recommend an alternative solution if necessary.
3. Be aware of potential side effects specific to certain eye drops
Some eye drops may have specific side effects that you should be aware of. For example, gentamicin eye drops may cause redness, itching, or swelling. If you are using a specific type of eye drop or medication, consult the label or your eye care professional for a list of potential side effects and how to manage them.
4. Report any severe or unusual side effects
If you experience any severe or unusual side effects after using eye drops, it’s important to report them to your eye care professional immediately. They can evaluate the situation and provide appropriate guidance or treatment.
5. Properly store the eye drops
After using the eye drops, make sure to recap the bottle tightly to prevent contamination. Follow the instructions on the eye drop bottle for proper storage. Some eye drops may require refrigeration, while others may need to be stored at room temperature. Adhering to the storage instructions will help maintain the effectiveness and safety of the eye drops.
Remember, if you have any concerns or questions about using eye drops or managing their side effects, it’s always best to consult with an eye care professional for personalized advice and guidance.
Proper Storage of Eye Drops
- Recap the eye drop bottle tightly: After administering the eye drops, it is important to secure the cap tightly to prevent any contamination or evaporation of the medication.
- Store in an area with controlled temperature: Eye drop bottles should be stored in a cool, dry place, away from direct sunlight and extremes of temperature. It is generally recommended to store them at room temperature, between 15-25°C (59-77°F).
- Follow specific storage instructions: Different eye drops may have specific storage requirements, so it is crucial to read and follow the instructions on the bottle. Some eye drops may need refrigeration, while others may need to be kept at a certain temperature range. It is important not to store them in the bathroom, as the humidity and temperature changes can affect the medication’s efficacy.
- Do not share eye drops: Eye drops are meant for individual use only, and sharing them can increase the risk of infection and contamination. Never use someone else’s eye drops, even if you have a similar eye condition.
- Check expiration dates: Eye drops have expiry dates for a reason. Using expired eye drops can be ineffective or even harmful. Always check the expiration date before using them and dispose of any expired eye drops properly.
Proper storage of eye drops is essential to maintain their effectiveness and prevent any unnecessary side effects. Following these storage guidelines can help ensure that your eye drops are safe and effective when you need them.