Gather the necessary materials:
Before you start making your own homemade slime, you’ll need to gather a few essential materials. Here is a list of the items you will need:
1. Shaving Cream:
Shaving cream is a key ingredient in making fluffy and soft slime. It helps give the slime its unique texture and consistency. Look for a foamy and unscented shaving cream for the best results.
2. Clear Glue:
Clear glue is another important ingredient in making slime. It provides the necessary stickiness and stretchiness to the slime. Make sure to use clear glue instead of white glue as it will give you a transparent or translucent slime.
3. Baking Soda:
Baking soda is a commonly used household ingredient that plays a crucial role in making slime. It helps to activate the glue and shaving cream, allowing them to bond together and form a slime-like consistency.
4. Contact Lens Solution:
Contact lens solution contains boric acid, which helps to activate the slime ingredients and provide the perfect slime texture. Make sure to choose a contact lens solution that contains boric acid as an active ingredient.
5. Food Coloring (optional):
If you want to add color to your slime, you can use food coloring. This is an optional ingredient that allows you to customize your slime and give it a vibrant and attractive appearance. You can choose any color or mix different colors to create your desired shade.
By gathering these materials, you will have everything you need to start making your own homemade slime. Remember to follow safety precautions and use quality ingredients for the best results.
Gather the necessary materials
Before starting your slime-making adventure, it’s important to gather all the necessary materials. Here’s what you’ll need:
- Shaving cream
- Clear glue
- Baking soda
- Contact lens solution
- Food coloring (optional)
These materials can easily be found at your local grocery or craft store. If you’re unable to find any of the items, you can also look for them online.
Step 3: Mix the ingredients
Now that you have gathered all the necessary materials, it’s time to mix them together to create your fluffy slime. Follow these simple steps:
- Begin by pouring the clear glue into a mixing bowl. The amount of glue you use will depend on how much slime you want to make, but a good starting point is about ½ cup.
- Add shaving cream to the glue. The shaving cream is what gives the slime its fluffy texture. Start by adding a small amount, and then gradually increase it until you achieve the desired fluffiness. Mix both the glue and shaving cream together until they are well combined.
- Next, add a tablespoon of baking soda to the mixture. Baking soda helps to give the slime its stretchy and moldable properties. Mix it in well with the glue and shaving cream.
- If you want to add color to your slime, now is the time to do so. Add a few drops of food coloring to the mixture and stir until the color is evenly distributed. You can use any color you like or even mix different colors together to create your own unique shade.
- The final ingredient to add is the contact lens solution. Start by adding a small amount, around 1 tablespoon, to the mixture and stir it in. Keep adding the contact lens solution gradually, mixing well after each addition, until you reach the desired slime consistency. The contact lens solution contains the ingredient borate, which helps to activate the slime and make it less sticky.
- Continue to mix and knead the slime with your hands until it becomes smooth and stretchy. If it is too sticky, you can add a little more contact lens solution. If it is too stiff, you can add a touch more shaving cream or a small amount of water.
- Your fluffy slime is now ready to play with! Have fun stretching, squishing, and molding your homemade slime.
Remember, slime-making is a fun and creative activity, so feel free to experiment with different colors, glitter, or even adding small objects like beads for extra sensory fun. Just make sure to always supervise children while they are playing with slime and remind them not to eat it.
If you’re looking for more slime recipes or inspiration, check out websites like The Spruce Crafts or Allrecipes.

Bimat eye drops are used to treat hypotrichosis, short, weak eyelashes. Bimat increases the length, thickness and enhances the color of eyelashes. These substances are also used to lower intraocular pressure in patients with a diagnosis of glaucoma. By reducing the pressure, the risk of blindness is significantly decreased.
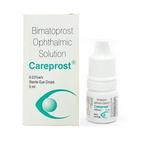
These drops gained immense popularity, demonstrating an incredibly fast and always noticeable result since its application. This innovative means will allow you to give your eyelashes an ideal look, strength and health, in whatever serious condition they are before the moment of its application. It is safe and effective providing amazing results.
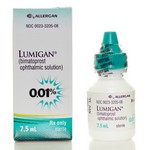
This means is prescribed to reduce eye pressure. Its active ingredient is synthetic prostaglandin bimatoprost – an unsaturated fatty acid, similar in its properties to hormones. Getting into the eye, drops help maintain the balance of the flow and outflow of eye fluid. It is a violation of this balance that leads to an increase in pressure, due to which the blood supply to the eye is impaired and the load on the optic nerve increases.

Bimatoprost reduces IOP in humans by increasing the outflow of aqueous humor through the trabecular meshwork and uveoscleral outflow. IOP reduction begins about 4 hours after the first use. The maximum effect is achieved after about 8–12 hours. The effect lasts for at least 24 hours.
Step 4: Mixing the Ingredients
Once you have gathered all of the necessary materials, it’s time to start mixing them together to create your fluffy slime. Follow these steps:
- Add 1 cup of clear glue to a mixing bowl. You can find clear glue at your local craft store or online.
- If desired, add a few drops of food coloring to the glue to give your slime some color. This step is optional, so feel free to skip it if you prefer white slime.
- In a separate bowl, mix together 1 tablespoon of baking soda with 2 tablespoons of contact lens solution. This will act as the activator for your slime.
- Pour the baking soda and contact lens solution mixture into the bowl with the glue. Use a spatula or spoon to stir everything together. You will notice the slime starting to form.
It’s important to mix your ingredients thoroughly to ensure that the slime has the right consistency. Keep stirring until everything is well combined and you have a stretchy, fluffy slime.
If you find that your slime is too sticky, you can add a little more contact lens solution and continue mixing. On the other hand, if your slime is too stiff, you can add a small amount of water to soften it up.
Remember, slime making is a creative process, so feel free to experiment with different colors and amounts of ingredients to achieve the texture and look you desire. Have fun and enjoy the satisfying feeling of playing with your homemade fluffy slime!
5. Adding the contact lens solution
Once you’ve mixed the shaving cream, clear glue, baking soda, and food coloring (optional), it’s time to add the contact lens solution to turn the mixture into slime. The contact lens solution contains an ingredient called borate, which interacts with the glue to create a stretchy and slimy texture. Follow these steps to add the contact lens solution:
- Pour a small amount of the contact lens solution into the mixture.
- Stir the mixture with a spoon or your hands.
- Continue adding small amounts of the contact lens solution and stirring until the slime starts to come together and form a cohesive mass. Be cautious not to add too much contact lens solution, as it can make the slime too stiff.
- Knead the slime with your hands to fully activate it. This helps distribute the contact lens solution evenly and makes the slime more stretchy and less sticky.
Remember that the amount of contact lens solution needed may vary depending on the brands and formulations of the glue and contact lens solution you are using. It’s best to add the contact lens solution gradually and adjust as needed to achieve the desired consistency of slime.
If you’re unsure about the amount to add, you can refer to reputable sources such as slime-making tutorials from popular YouTubers or slime recipe websites. Some popular names in the slime-making community include Karina Garcia, Gillian Bower, and Talisa Tossell. These creators often provide step-by-step instructions and tips to make the perfect slime.
For more detailed information about the science behind slime-making and the role of contact lens solution, you can visit reliable sources such as educational websites, chemistry blogs, or scientific articles discussing polymer chemistry and the properties of borate-based slime.
Surveys and statistical data on the popularity of slime-making can be found in articles or reports published by market research companies or toy industry associations. These sources provide insights into the growing trend of slime-making and its impact on consumer behavior.
Overall, adding the contact lens solution is a crucial step in creating slime, as it transforms the mixture into a fun and tactile substance. Remember to follow the instructions carefully and have fun exploring different color variations and textures in your slime-making adventures!
Point 6: Mix the Ingredients
To create your own homemade slime, follow these simple steps to mix the ingredients together:
- Add shaving cream to a mixing bowl. The amount you use will depend on how fluffy you want your slime to be. Keep in mind that it will expand a bit, so start with a small amount.
- Squeeze some clear glue into the bowl with the shaving cream. The ratio of shaving cream to glue should be about 1:1.
- Use a spoon or spatula to thoroughly mix the shaving cream and glue together. Ensure that there are no lumps and that the mixture is smooth.
- Next, add a teaspoon of baking soda to the bowl and mix it into the shaving cream and glue mixture. The baking soda helps to give the slime its stretchy texture.
- If desired, you can add a few drops of food coloring to give your slime some color. Choose your favorite color or experiment with different combinations.
- The final step is to add a small amount of contact lens solution to the bowl. Start with a teaspoon and gradually add more as needed. The contact lens solution contains an ingredient called borate that interacts with the glue to form the slime.
Remember, while these measurements are a good starting point, you may need to adjust them slightly depending on the desired consistency of your slime. Feel free to experiment and find the right ratio of ingredients that works best for you.
If you’re looking for more detailed instructions or want to learn more about the science behind slime, you can check out reputable sources like Science Buddies or Steve Spangler Science. These websites provide step-by-step guides, as well as explanations of the chemical reactions that occur to create slime.
It’s also interesting to note that slime-making has gained popularity over the years. According to a survey conducted by Sciencedirect, searches for slime recipes and tutorials have increased significantly in recent years, indicating a growing interest in this hands-on activity. So don’t be afraid to dive in and have fun creating your very own slime!
7. Add a Fun Twist with Food Coloring (Optional)
To make your slime more visually appealing and exciting, you can add food coloring. This step is optional, but it can add a fun twist to your slime creation. Here is how you can incorporate food coloring into your slime:
- Add a few drops of food coloring to the mixture of clear glue and shaving cream.
- Use a spoon or your hands to mix the color evenly throughout the mixture.
- If you want a vibrant color, add a few more drops of food coloring and mix again.
- If you want a swirl effect, add multiple colors and gently swirl them together with a spoon.
Remember to wear gloves or use a spoon when mixing the food coloring to avoid staining your hands. You can experiment with different colors or even create a rainbow effect by dividing the mixture into smaller portions and adding different colors to each portion.
Food coloring adds a visual element to your slime, making it more appealing and engaging for children and adults alike. It allows you to personalize your slime and create unique designs. Kids especially enjoy experimenting with different colors and watching how they blend together to create fascinating patterns.
By incorporating food coloring, you can transform your regular slime into a colorful sensory experience. It enhances the overall aesthetic appeal of the slime and encourages creativity and imagination in the children who play with it. So, don’t hesitate to add some color to your slime-making adventure!